Safari chef 2 – First look
introduction
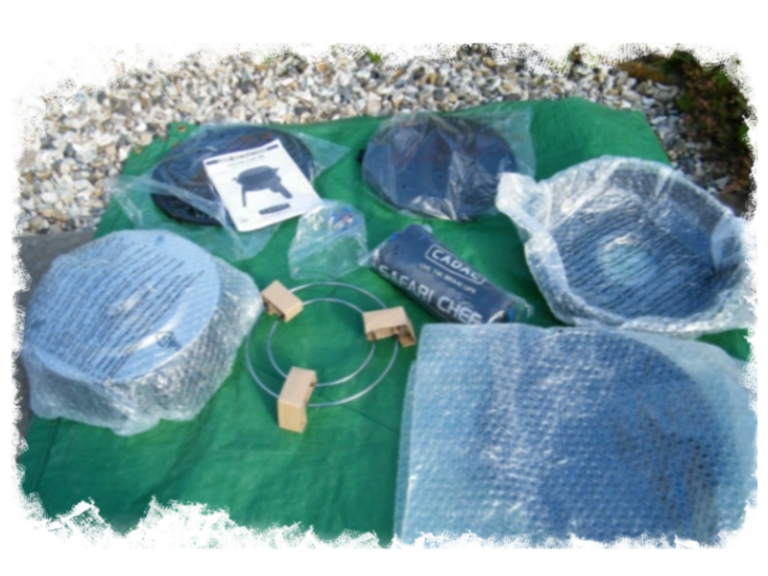
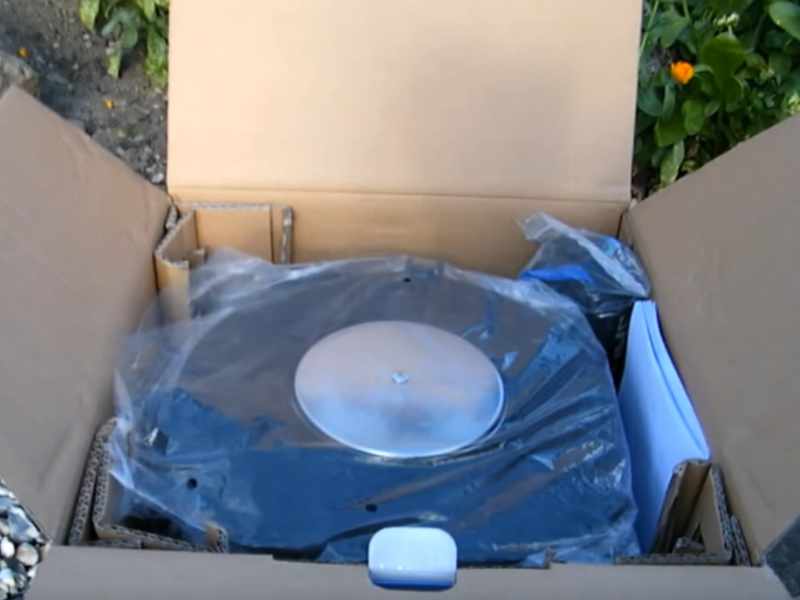
First look – un-boxing the Safari chef 2 low pressure BBQ review. In this first look review we’ll start with un-boxing the Safari chef 2, then we’ll take a closer look at what get as well as what we don’t get in the box.
Table of contents:
- unboxing the Safari chef 2
- What we get
- What we don’t get!
un-boxing the Safari chef 2
First look – un-boxing the Safari chef 2 low pressure BBQ review. In this first look review we’ll start with un-boxing the Safari chef 2, then we’ll take a closer look at what get as well as what we don’t get in the box.
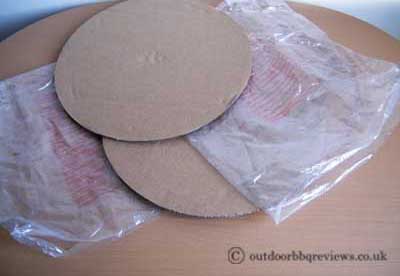
Save the packaging
First look – un-boxing the Safari chef 2 low pressure BBQ review. In this first look review we’ll start with un-boxing the Safari chef 2, then we’ll take a closer look at what get as well as what we don’t get in the box.
What you get, a closer look
chef pan
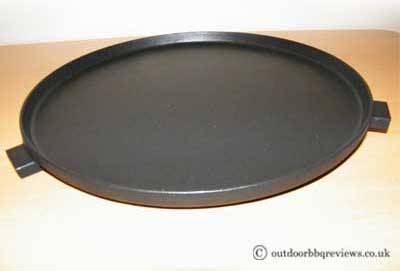
The Chef Pan like the Grid plate, is coated in a non-stick easy clean black sparkling finish on the cooking side. The underside of the Chef pan, like the Grid Plate is matt black with a heat deflector plate in the center.
The Chef Pan is actually a little smaller than the Grid plate, being about 26 cm or 10 and 1/4 inches in diameter. So it’s almost a couple of inches smaller than the Grid Plate.
There is a reason for the Chef Pan being smaller and this will be covered in the Assembly section.
The Chef Pan is about 1/2 inch deep and was designed to be shallow on purpose to promote healthy eating by minimizing fat. The Chef pan, due to its shallow height, is not suitable for deep flying.
In terms of weight, I’d say the Chef pan was just a tab lighter than the Grid Plate. It’s very light and easy to handle.
Duis aute irure dolor in reprehenderit in voluptate velit esse cillum dolore eu fugiat nulla pariatur. Excepteur sint occaecat cupidatat non proident.
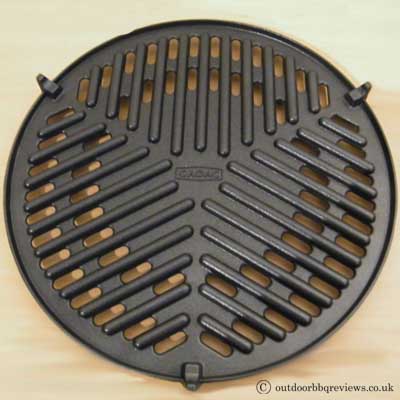
Grid pan
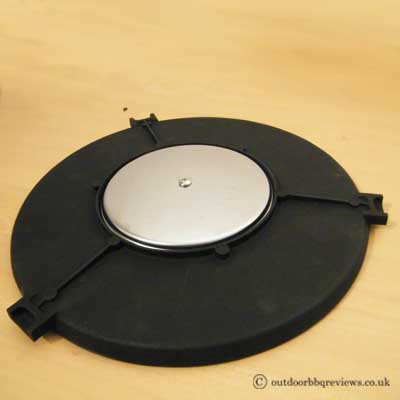
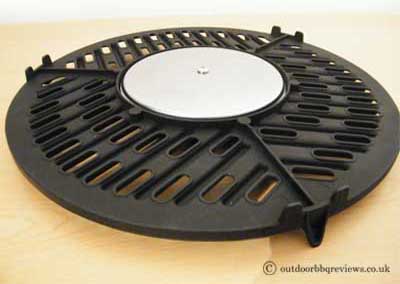
The grid plate is light weight and made of metal. The top metal cooking side is coated in a non-stick easy clean coating which has that black sparkling appearance to it. The underside is metal with a matt black finish and in the centre of the plate is the heat deflector shield.
The Grid Plate is 29 cm in diameter or just under 11.5 inches.
So for simplicity, it’s less than a foot across. Not a bad cooking size really.
I would say it weighs around 1/2 a kilo or less.
The grids themselves are about 5mm tall or 1/4 so there quite large, which is good as this lifts the food off the grid and allows the fat to run off into the grooves without which helps prevent the food from sticking to the grid.
There are fat drip holes all around the outer edge of the Grid Plate which will allow the fat to drain off and down into the fat pan trance below.
The Grid Plate fat drainage holes are positioned so that they are directly above the fat pan trench, which means the fat should only drain into the fat pan and away from the flame, reducing the risk of flare-ups.
We’ll talk more about the little hooks and handles in the next section – Assembling the Safari Chef 2 BBQ.
Duis aute irure dolor in reprehenderit in voluptate velit esse cillum dolore eu fugiat nulla pariatur. Excepteur sint occaecat cupidatat non proident.

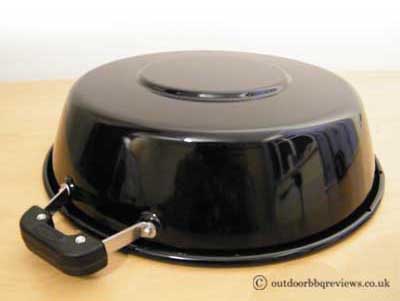
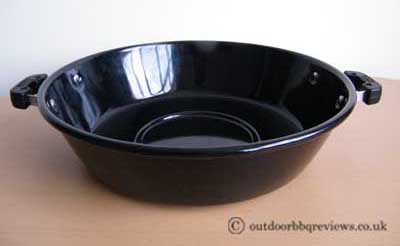
lid / wok
The lid can be used as a wok and is made of black smooth metal. Although it is light weight, it does carry a quality feel to it.
The bottom of the bowl is 9 inches in diameter and the top is 11 inches in diameter. The depth of the bowl is 3 inches deep.
The bottom of the bowl presses down and extrudes onto the underside. This is to allow the bowl to sit on the pot stand, which we will demonstrate in the next section.
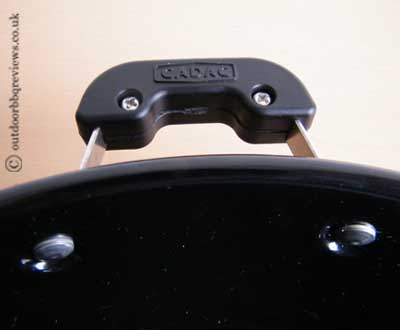
The handles are well secured to the bowl and the handles are wrapped in plastic covers which feature the Cadac logo.
The handles are 2.5 inches in length and 3 75th inches tall.
I feel when I pick up the bowl the handles give me a good feel of confidence and control when moving the bowl about.
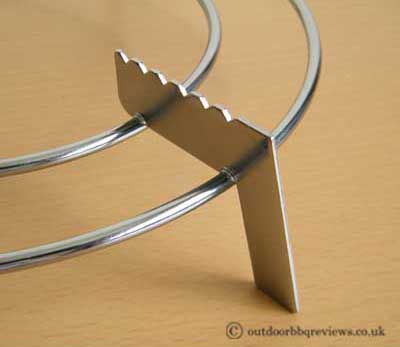
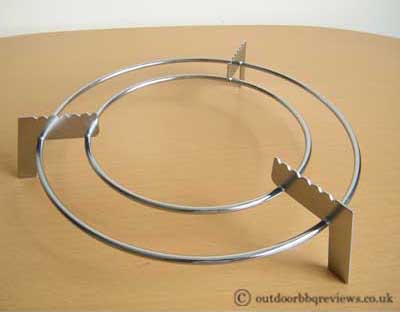
Pot stand
Now, to be honest, when I first saw the pot stand in photographs, I thought it looked like one of those flimsy bendy items you get made of wire. Well, I was very wrong.
The pot stand is in fact very strong and well welded. The pot stand is made of lightweight Zinc metal and the rings are strong and therefore won’t bend.
In fact, the rings are 3/8th tall and the metal legs are a couple of (mm) thick or 1/8th thick. The top of each leg is teethed to add extra grip, but don’t worry, this doesn’t damage the lid/wok in any way. Not a single mark.
The width of the pot stand is 8 inches in diameter.
and the distance between inner ring is 4 and 1/4 inches or just under 11cm, so obviously you’ll need kettles and pots with a diameter wider than 4 1/4 inch, which we admit is far too wide, and it would be ideal if the inner ring diameter was smaller. We have buying links for suitable kettles to buy, which will fit nicely on the pot stand.
For the latest Cadac Safari Chef 2 LP BBQ’s, the pot stand now sits inside rubber groves, making it far more stable, as well as more secure. A great update, ha, maybe we’ll buy a new BBQ.
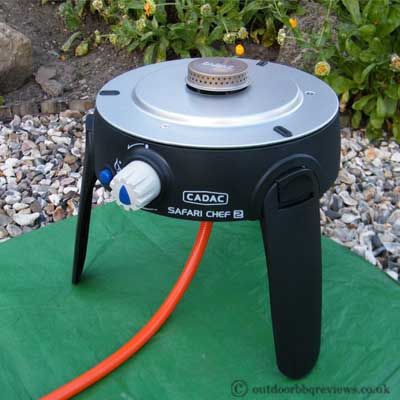
Main BBQ Unit
The main unit is made of black hardened plastic and aluminum metal, which has resulted in a massive weight reduction compared to the older Safari Chef model, which was an all metal design.
The Safari Chef 2 features the new piezo button, which is the small blue button with the lightning symbol. So you can kiss good-bye to matches, as all you need to do with Safari Chef 2 is turn the knob and press the piezo ignition button a couple of times and Safari Chef 2 bursts into life. I will demonstrate lighting up the Safari Chef 2 in the Cooking Section.
The piezo ignition button is made of hard blue plastic and requires the user to press in firmly until you hear a click. When you hear the click you’ll also see a blue streak of electricity appear out of the metal piezo lighter on top of the heat shield, shooting into the burner and so igniting the gas.
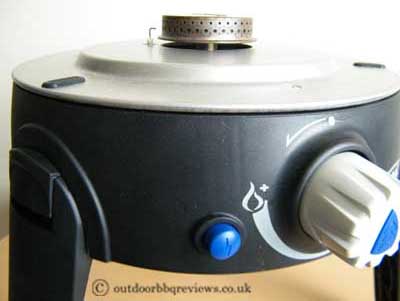
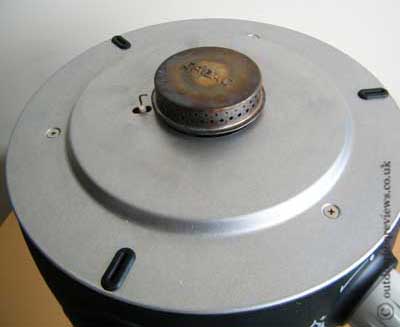
Gas burner
The burner is metal, of course, and is a petite 2.5 inches in diameter or 6.5 cm across and 3/4 inch deep/ 2.5cm. So it’s not very big, but really it’s about the same size as a home oven burner and as good as any caravan stove. I can assure you it does burn quite hot despite its size.
The burner can be unscrewed for maintain and cleaning. It screws off anti clockwise, as you would expect.
Now I first heard this next part on-line before checking it out myself, and I too am a little shocked to find that the thread that holds the burner is made of plastic!
Despite the fact the burner is held in place with a plastic thread, we have cooked on our Safari Chef 2 several times now and there has been absolutely no damage at all. But this thread should be made of metal period. I don’t understand why Cadac would choose plastic when clearly a metal thread would have been the better option.
heat shield
The top surface of the BBQ is protected by an aluminum heat shield which is screwed into place.
I’ll talk more about the 3 black things in the next section assembling the Safari Chef 2.
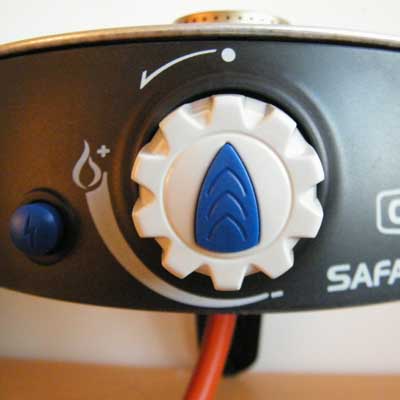
Heat control knob
Back to the front again and we have a very simple, easy to use control knob. You just press in and rotate it anticlockwise to control the flame.
I will go into more detail about the control knob in the cooking section.
The cooking control knob is 1.5 inches in diameter and 1 inch deep. It’s a good size and easy to handle. It presses in about 4mm and is not difficult to push in or turn although you do have to hold the BBQ with your hand to stop yourself from just pushing the BBQ backwards.
It only turns a quarter before it clips into place and then you have just over another quarter more worth of heat control going from max temperature to lower cooler temperature control setting.
I don’t know how much feedback Cadac receives, but I’ve read a lot of people’s views on the Carri and Safari models, where people want a numbered heat dial instead of a line. But unfortunately, you’re not getting a dial with the Safari Chef 2. So you’ll have to make do with a line and a blue arrow on the control knob.
In saying this we found controlling the flame via the control knob very intuitive and easy; after all there is only a 1/4 or so worth of heat control. But we’ll talk more about controlling the flame settings in the cooking section.
Underside
In the center of the Safari Chef 2 is the gas valve, which is made of brass metal. Thankfully, the thread, unlike the burner thread, is made of metal.
There are 6 rounded vent holes cut into the aluminum underside.
Although the Piezo Ignition wires are standard wires, I’m not a big fan of how thin and vulnerable the wires are. I would have liked it if the wires were thicker as this would have give me greater peace of mind. I’m extremely careful when I handle the Safari Chef 2 so as not to touch or pull on the wires and I advise you do the same.
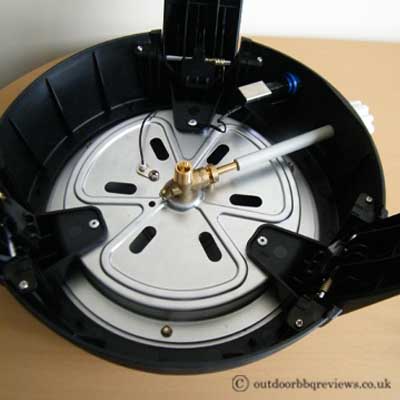
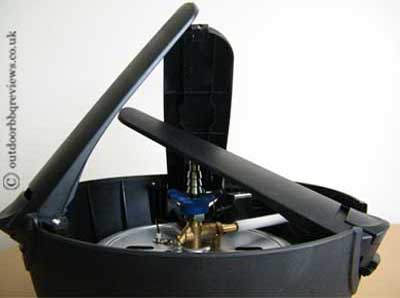
legs
The legs are made of black hardened plastic.
Each leg is 9.5 inches/ 24cm long and 2 3/4 inches / 7cm wide. Each leg has a rubber stud on the bottom for extra grip. If we look at the underside we can see the leg springs which in my opinion look pretty strong and long-lasting.
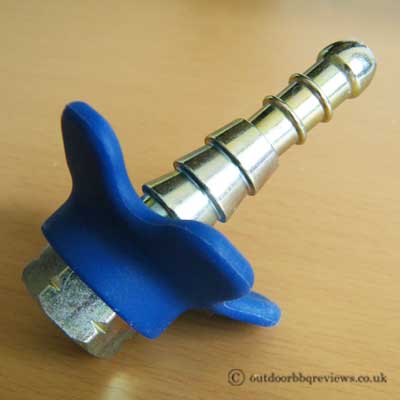
gas valve
Cadac generously gives you a free gas valve which screws onto the bottom of the main unit. We’ll demonstrate this later on in the review.
You only need the gas valve for gas bottles and not for gas canisters. The valve is compatible with either butane or profane hoses.
You can’t leave the gas valve on the Safari Chef 2 BBQ as it will prevent the legs from fully closing, which also means you can’t pack it away into its bag.
Now the old Safari Chef model had those big circular holes cut into its legs which allowed when folded down the gas hose to poke through.
It looks like Cadac, on the quest to improve the Safari Chef 2, chose to abandon the functionality of the legs for a more aesthetically pleasing design. Which to be honest I do like the new leg design more as it makes the Safari Chef 2 look more slick and modern.
Of course, the legs are now being made of hardened plastic and no longer metal as they were on the old Safari Chef. Cutting holes into them would compromise the structural integrity of the Safari Chef 2.
But now I’m aware of the gas valve issue. I feel Cadac should have designed the legs differently. But all in all it looks like nothing more than a compromise between reducing weight and keeping functionality. It’s hard to make things perfect.
This of course is not the end of the world, but it’s not ideal to have to keep screwing the valve on and off at the start and end of each holiday which could over time wear out the valve screw.
There is an alternative accessory you can buy for the Safari Chef 2, which is a quick release Gas Valve. It would still limit the leg closer, but the legs should be close enough to get them back into the bag and the bag is big enough if the legs have to stick out a little.
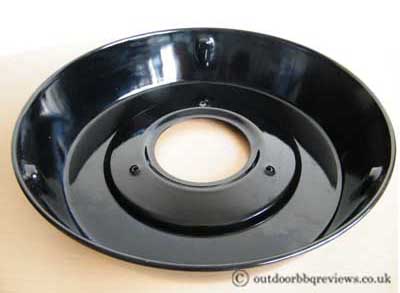
Fat Pan
The fat pan is made of the same black smooth metal as the Lid/Wok and is also very lightweight. I’d say a little lighter than the Lid/Wok is. In fact, the Safari Chef 2 components are so light not even a kid would find it heavy. Now that’s saying something.
The top diameter of the Fat Pan is bang on a foot/ 12 inches or 30 cm in diameter and the base is 10 and 1/4 inch in diameter, or just over 26cm.
The Fat Pan is 2 and 3/4 inches deep and there is a hole in the middle to allow the burner to pop through.
The inner extruded circle slopes down towards the outer edge of the fat pan, which draws any fat away from the main burner and instead directs the fat into the fat trench.
The trench it’s self is 1.5 inches wide and is more than big enough to hold a sessions worth of fat.
Pro tip: Did you know that you are supposed to pour a little water into the trench? Yes, that’s right and that is why there are drilled holes in the pan, to allow excess water to drain out, through you do not need much water in the trench, just a little. You see, when you cook, fat drips down into this trench and if you add a little water to the trench the fat will mix with the water, making it very easy to clean later. In fact, you should be able to simply pour the fat out and then easily wipe the fat pan clean. We will demonstrate this in our cleaning section.
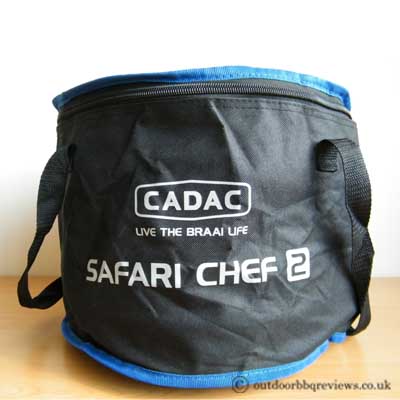
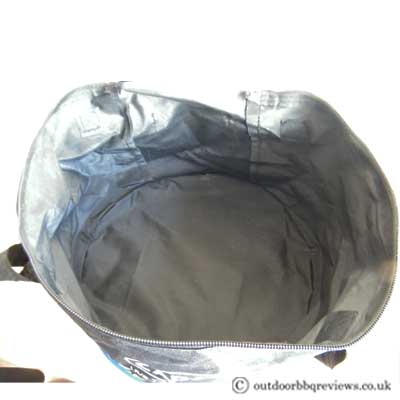
bag
The Safari Chef 2 bag is made of durable canvas material and is large enough to fit all the Safari Chef 2 components in it with a little room to spare.
See Packing away and Storage for some examples of what else can fit into the Safari Chef 2 bag, as well as a video demonstration of packing the Safari Chef 2 away.
Inside the main bag compartment. I’ve already said this compartment is more than big enough to store the Safari Chef 2 BBQ with room to spare.
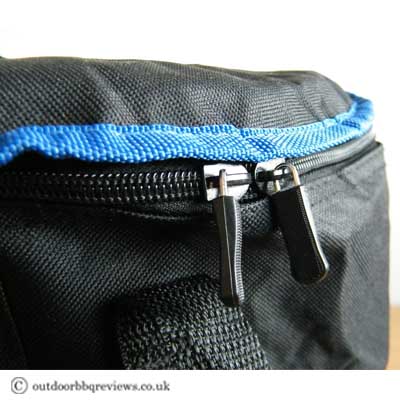
Inside the lid compartment, which as you can see has a thin canvas divider for the cooking plates. The lid has its own zip which is of the same quality as the main bag zips. You can’t access the lid compartment without having to open the main bag.
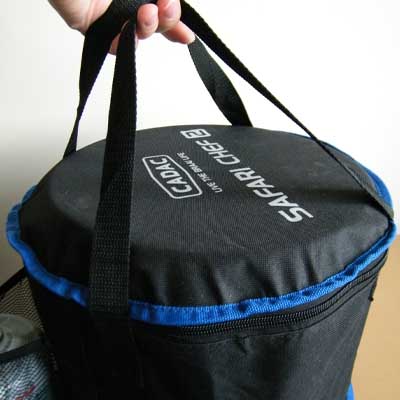
Safari Chef 2 Bag Handles
The handles are made of durable 1 inch, think canvas, and when held like in the photo below, the distance from hand to bag is around 6 inches. This means for most people the bag hangs just above knee height which makes for comfortable carrying. The short 6 inch high handles make the bag rigid and easy to control while carrying.
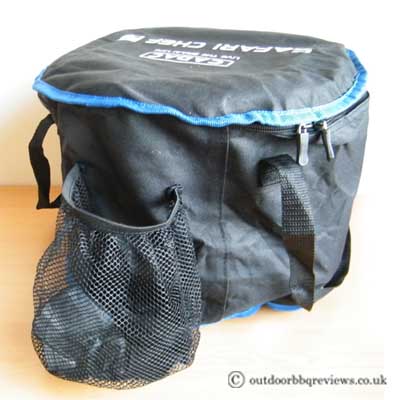
At the rear of the bag is a Net compartment which is designed to hold gas canisters.

manual
The manual is paper back and is just under 6 inches/14.5cm wide and 81/4 tall/21cm.
The manual is 61 pages long but don’t worry as only the first 6 pages are English and the rest are foreign languages. So it’s a very short simple manual and very quick to read through.
Page 1: general information and safety instructions
Page 2: covers assembly instructions
Page 3: component list – full illustrated anatomy of the Safari Chef 2
Page 4 and page 5: the manual covers fitting and changing the hose and gas cylinder, using the appliance.
Cooking options:
Although there are no recipes in the Safari Chef 2 manual, the Cadac can basically cook nearly anything with all its various accessories.
More about what you can cook with Safari Chef 2 in our cooking section.
Cleaning, general maintenance, returning the appliance for repair or service.
The Safari Chef 2 is guaranteed for 2 years against factory faults. Given the success of the old safari chef, I would have thought the guarantee would be at least 5 or 6 years considering how many people have had their Safari Chefs in access for ten years without fault. In fact, people normally only buy a new Safari Chef only after their old one finally wears out.
Spares and accessories
There are spares for the entire safari’s components which I assume would be free under guarantee but I’m sure Cadac would allow you to purchase this if necessary, even if your guarantee ran out.
Safari chef 2 low pressure Pro – Manual
You can download the ‘Safari chef 2 low pressure’ manual via our download button (the manual will download as a PDF, which will open in your browser). Or, you can visit the Cadac website directly to view and download the manual